
Smiggle Projector Clock Instructions PDF: A Comprehensive Guide
Discover a detailed resource for your Smiggle projector clock, offering a comprehensive guide to setup, features, and troubleshooting, often found as a downloadable PDF.
Understanding the Smiggle Projector Clock
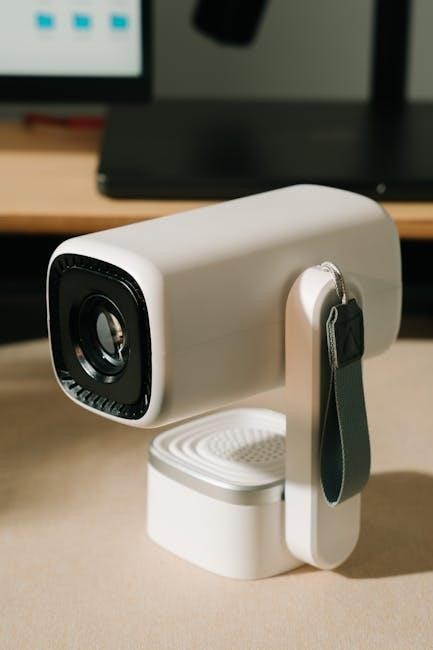
The Smiggle Projector Clock is a popular novelty item, especially among children, combining time-telling with a fun projection feature. These clocks typically display the time using light projected onto a wall or ceiling, often accompanied by changing colors or patterns. Understanding its core functionalities is crucial before diving into detailed instructions.
Common features include adjustable brightness settings, alarm functions, and various projection modes. The clock’s operation relies on a combination of buttons and potentially a small LCD screen for initial setup. Many users seek a PDF instruction manual to navigate these features effectively. Familiarizing yourself with the clock’s components – buttons, power source, and projection lens – will streamline the setup process. Knowing these basics will help you troubleshoot potential issues and maximize the clock’s entertainment and practical value.
Locating the Official PDF Instructions
Finding the official PDF instructions for your Smiggle Projector Clock can sometimes be challenging, as they aren’t always readily available in the product packaging. The primary source is usually the Smiggle website itself; navigate to their support or product page and search for your specific clock model. Alternatively, retailers who sell the clock, like department stores or online marketplaces, may host the PDF on their websites within the product details section.
If a direct download link isn’t found, try searching online using specific keywords like “Smiggle Projector Clock [model number] instructions PDF”. User forums and communities (discussed later) often share links to these documents. Be cautious when downloading from unofficial sources to avoid potential malware; always verify the file’s safety before opening it.
Troubleshooting Common Issues
When facing problems with your Smiggle Projector Clock, several common issues can arise. If the projection is dim, check the brightness settings and ensure the room isn’t overly lit. Time inaccuracies often require resetting the clock following the PDF instructions. A non-responsive alarm might indicate low batteries or incorrect alarm settings – consult the manual for proper configuration.
If the clock isn’t powering on, verify the power source and try replacing the batteries. For projection distortions, ensure the clock is placed on a stable, level surface. If issues persist, searching online forums or the Smiggle support website can provide solutions from other users or official support staff. Remember to refer to the PDF for detailed troubleshooting steps.

Setting Up Your Smiggle Projector Clock
Begin by unpacking your Smiggle clock and referencing the PDF instructions for a smooth setup process, ensuring optimal projection and functionality.
Initial Power-Up and Time Setting
Upon first use, insert the required batteries or connect the power adapter, as detailed in the Smiggle projector clock’s PDF manual. The display should illuminate, initiating the clock’s operational state. To set the correct time, locate the designated ‘Set’ or ‘Mode’ button – its specific location is visually illustrated within the instruction PDF.
Pressing this button typically cycles through hour, minute, and potentially year/month/day settings. Utilize the up and down arrow buttons, or similar controls, to adjust each value accurately. Confirm each setting by pressing ‘Set’ again, progressing through each time component. The PDF guide provides clear diagrams showing button placements and the sequential setting process. Ensure AM/PM is correctly configured for accurate timekeeping. A successful setup will display the current, correct time on the clock’s screen, ready for projection.
Projecting the Time and Adjusting Brightness
Once the time is set, activate the projection feature using the dedicated ‘Projection’ button, clearly identified in the Smiggle projector clock’s PDF instructions. The current time will now be displayed onto a nearby surface. Adjust the projection focus using the focus ring or dial, ensuring a sharp and clear image. The PDF manual illustrates the optimal projection distance for clarity.
Brightness control is crucial for comfortable viewing. Locate the brightness adjustment buttons – often marked with a sun or lightbulb icon – and use them to increase or decrease the projection’s intensity. The PDF guide details the available brightness levels. Experiment to find a setting suitable for the ambient light in your room. Some models offer automatic brightness adjustment; consult the PDF for details on enabling this feature.

Advanced Features and Functions
Explore the Smiggle projector clock’s full potential, including alarm settings, projection modes, and customizable display options, detailed within the PDF manual.
Utilizing the Alarm Function
The Smiggle projector clock’s alarm function offers a convenient way to wake up with the time projected onto your ceiling or wall. The PDF instructions detail how to set multiple alarms, customizing both the time and duration. You’ll find guidance on selecting different alarm sounds, ranging from gentle melodies to more assertive tones, ensuring a wake-up experience tailored to your preference.
Crucially, the manual explains how to activate and deactivate the snooze function, allowing for a few extra minutes of rest. It also clarifies the process of adjusting the alarm volume to a comfortable level. Troubleshooting tips within the PDF address common issues, such as alarms not sounding or displaying incorrectly. Understanding these features, as outlined in the official documentation, maximizes the alarm’s usability and ensures a reliable wake-up experience.
Exploring Different Projection Modes

The Smiggle projector clock boasts several projection modes, enhancing its versatility. The PDF instructions thoroughly explain each option, including standard time projection, date display, and potentially rotating projections for a dynamic visual effect. Users can learn how to adjust the projection angle and focus for optimal clarity on various surfaces – walls, ceilings, or even tents.
Detailed diagrams within the manual illustrate the impact of different settings on the projected image. The PDF also clarifies how to cycle through these modes using dedicated buttons on the device. Troubleshooting sections address common projection issues, like blurry images or incorrect orientation. Mastering these modes, as detailed in the official guide, unlocks the full potential of the Smiggle projector clock’s display capabilities.
Customizing Display Settings
The Smiggle projector clock’s PDF manual provides extensive guidance on personalizing the display. Users can adjust brightness levels to suit ambient lighting conditions, ensuring optimal visibility without causing distraction. The instructions detail how to modify the time and date formats – switching between 12 and 24-hour modes, and various date arrangements.
Furthermore, the PDF explains options for customizing the projected image’s color, if available on your model. It also covers settings related to auto-dimming, which automatically adjusts brightness based on room light. Troubleshooting sections address issues like incorrect time displays or unresponsive buttons. By carefully following the PDF’s instructions, users can tailor the clock’s display to their precise preferences, maximizing usability and enjoyment.

Cache-Control: No-Cache Directive Relevance
Understanding HTTP’s Cache-Control: no-cache directive is crucial for developers ensuring fresh content, bypassing cached versions for dynamic updates and testing.
HTTP Cache-Control Header Explained
The HTTP Cache-Control header is a powerful mechanism used to define caching policies for both requests and responses. It allows servers and browsers to negotiate caching behavior, optimizing web performance and reducing bandwidth consumption. Directives within this header instruct caching mechanisms – like browsers and proxy servers – on how to handle responses. These directives range from specifying maximum age (max-age) to controlling revalidation strategies.
Crucially, the header isn’t just about allowing caching; it’s about controlling it. Different directives offer varying levels of control, from completely disabling caching (no-store) to requiring revalidation before using a cached copy (must-revalidate); Understanding these nuances is vital for developers aiming to deliver a seamless user experience and ensure data freshness. Properly configured caching significantly impacts website speed and server load.
The ‘no-cache’ Directive in Detail
The no-cache directive, within the Cache-Control header, doesn’t necessarily mean “don’t cache.” Instead, it mandates that a cached response must be revalidated with the origin server before being used. This revalidation typically involves sending a conditional request, checking if the resource has changed since the last cached version. If unchanged, the server responds with a 304 Not Modified, saving bandwidth.
Effectively, no-cache forces the browser to always check with the server to ensure the cached copy is still current, even if the cache entry hasn’t expired. It’s often preferred over no-store when caching is desired, but freshness is paramount. Chrome, notably, responds favorably to no-cache, initiating conditional requests for validation.
Impact of ‘no-cache’ on Browser Behavior
When encountering the no-cache directive, browsers adopt a specific pattern. They won’t serve a cached response without first revalidating it with the origin server. This triggers a conditional request, utilizing headers like If-Modified-Since or If-None-Match to determine if the cached version is still valid.
Crucially, Chrome demonstrates a preference for no-cache, consistently issuing these conditional requests. Conversely, no-store can sometimes lead to unexpected behavior, with Chrome occasionally loading from the cache even without a validation attempt. This difference highlights no-cache’s reliability in ensuring up-to-date content, impacting development workflows and user experience.

Minimizing File System Caching Effects (nocache tool)
The nocache tool intercepts file operations, reducing reliance on the Linux file system cache, improving application performance and data accuracy.
How ‘nocache’ Intercepts Open and Close Operations
The nocache tool functions by strategically intercepting the standard open and close system calls within a Linux environment. This interception isn’t about preventing file access; rather, it’s about subtly influencing how the operating system manages the file system cache. When an application attempts to open a file, nocache steps in before the kernel’s default caching mechanisms are engaged.
Specifically, upon a close operation, instead of allowing the kernel to place the retrieved blocks at the most recently used (MRU) end of the Least Recently Used (LRU) list within the buffer cache, nocache repositions them to the least recently used (LRU) end. This seemingly small change has a significant cumulative effect. By consistently demoting blocks, nocache discourages the kernel from aggressively caching frequently accessed files, leading to a more dynamic and potentially more accurate reflection of actual data on disk.
Benefits of Reducing File System Cache Reliance
Minimizing reliance on the file system cache, as achieved with tools like nocache, offers several advantages, particularly in development and testing scenarios. A reduced cache dependency ensures that applications interact more directly with the underlying disk, providing a more accurate representation of real-world performance. This is crucial for identifying and resolving issues related to data staleness or incorrect caching behavior.
Furthermore, decreasing cache reliance can help pinpoint performance bottlenecks that might be masked by aggressive caching. By forcing more frequent disk reads, developers can gain a clearer understanding of I/O performance and optimize their applications accordingly. This approach is especially valuable when dealing with frequently updated data or applications sensitive to data consistency, leading to more reliable and predictable results.

Chrome Extension: One Click No Cache (OCNC)
OCNC is a handy Chrome extension simplifying cache clearing with a single click, ideal for developers needing a quick refresh during testing processes.
Using OCNC for Development and Testing
One Click No Cache (OCNC) proves invaluable during web development and rigorous testing phases. Developers frequently encounter caching issues where browsers serve stale content, hindering accurate assessment of code changes. OCNC swiftly bypasses the cache, ensuring each reload fetches the latest version directly from the server. This eliminates ambiguity and accelerates the debugging process.
For testers, OCNC guarantees a clean slate with every test run, preventing prior cached data from influencing results. It’s particularly useful when verifying dynamic content or functionality dependent on server-side updates. The extension’s simplicity—a single click—integrates seamlessly into existing workflows, saving valuable time and effort. It’s a lightweight solution for maintaining a consistent testing environment and validating web application behavior effectively.
Comparing ‘no-cache’ vs. ‘no-store’ Directives
Understanding the nuances between HTTP cache directives ‘no-cache’ and ‘no-store’ is crucial for controlling browser caching behavior. ‘no-cache’ doesn’t prevent caching entirely; instead, it mandates that the browser revalidates the resource with the server before using the cached version. This allows for conditional requests, potentially saving bandwidth if the resource hasn’t changed.
Conversely, ‘no-store’ is far more restrictive. It explicitly instructs the browser and any intermediary caches not to cache the response under any circumstances. This is ideal for sensitive data where caching poses a security risk. Chrome, however, sometimes exhibits inconsistent behavior with ‘no-store’, occasionally loading from cache despite the directive, making ‘no-cache’ with revalidation a more reliable approach in many scenarios.

Finding Alternative Instruction Sources
Explore online forums, user communities, and video tutorials for Smiggle projector clock guidance if the official PDF instructions are unavailable or unclear.
Online Forums and User Communities
Engage with fellow Smiggle projector clock owners in dedicated online forums and user communities; these platforms frequently host threads discussing setup challenges, troubleshooting tips, and shared experiences. Searching relevant keywords like “Smiggle projector clock help” or “Smiggle clock instructions” can quickly surface valuable discussions.
Benefit from the collective knowledge of other users who may have encountered and resolved similar issues. Many forums allow users to upload images or videos demonstrating solutions, providing a visual aid alongside textual explanations. Active communities often have members willing to offer personalized assistance, guiding you through the setup process or helping diagnose specific problems with your device. Remember to clearly articulate your issue when posting, including the model number of your Smiggle clock for more targeted support.
Video Tutorials and Demonstrations
Supplement written instructions with visual guidance by exploring video tutorials and demonstrations available on platforms like YouTube. Searching for “Smiggle projector clock setup” or “Smiggle clock tutorial” will likely yield helpful videos showcasing the clock’s features and setup process. Visual learners often find videos easier to follow than text-based guides, particularly when dealing with complex settings or adjustments.
Observe step-by-step demonstrations of how to power up the clock, set the time, adjust projection brightness, and utilize the alarm function. Many videos also address common troubleshooting issues, providing practical solutions to problems you might encounter. Pause and rewind as needed to fully grasp each step, and consider subscribing to channels that regularly post content related to Smiggle products for future updates and support.