Gigabyte B650 Gaming X AX Manual: Comprehensive Guide
This comprehensive guide details the Gigabyte B650 Gaming X AX motherboard, offering free instruction manuals, BIOS parameter insights, and troubleshooting assistance for optimal performance.
Explore specifications, fan control configurations, storage connectivity (SATA & M.2), and software/driver installation. Find solutions for CPU fan speed issues and boot problems.
The manual covers component overviews, memory compatibility, front panel connector guides, PCIe slot configurations, and warranty information, ensuring a smooth user experience.
The Gigabyte B650 Gaming X AX motherboard represents a powerful foundation for modern PC builds, designed to harness the capabilities of AMD Ryzen processors. This manual serves as a detailed resource for users, from novice builders to experienced enthusiasts, seeking to understand and optimize their system. It provides comprehensive guidance on installation, configuration, and troubleshooting, ensuring a seamless and rewarding experience.
This ATX form factor board (8.9 x 9.6 inches) boasts robust features, including advanced BIOS settings, multiple storage options (SATA and M.2), and effective cooling solutions. Users can access a 256MB flash BIOS, crucial for system stability and updates. The manual aims to demystify the complexities of motherboard setup, empowering users to unlock the full potential of their hardware. It’s a vital companion for anyone utilizing this Gigabyte platform.
Unboxing and Component Overview
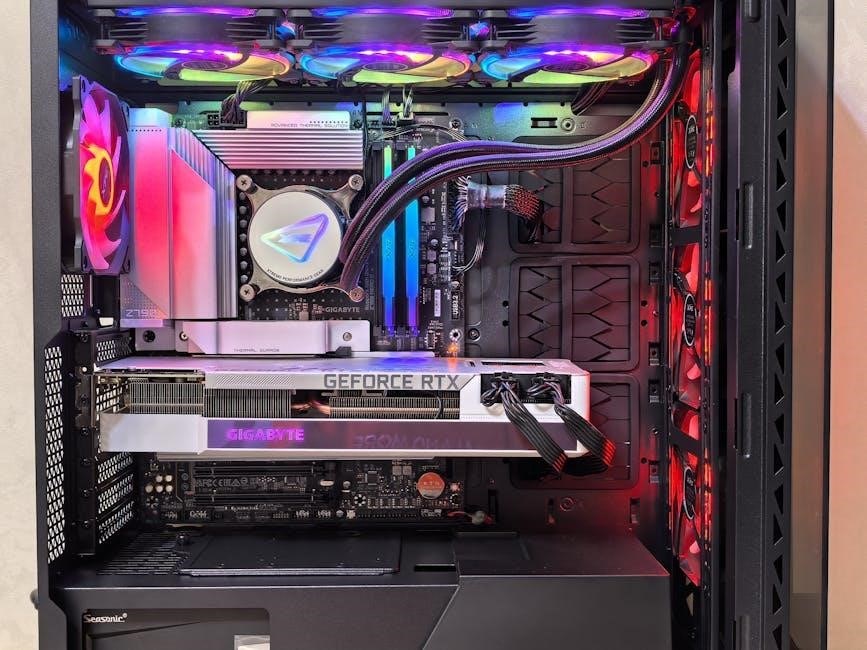
Upon unboxing your Gigabyte B650 Gaming X AX, carefully inspect the contents. You should find the motherboard itself, a user manual (this document!), SATA cables for connecting storage devices, and potentially other accessories like case screws or I/O shields. The motherboard’s surface features a variety of components, each serving a specific function.
Key elements include the AMD AM5 CPU socket, DIMM slots for RAM installation, PCIe slots for graphics cards and expansion cards, M.2 slots for high-speed NVMe SSDs, and the rear panel I/O connectors. Familiarize yourself with the location of front panel connectors for power and USB ports. Understanding these components before installation will streamline the build process and prevent potential issues. Refer to the diagrams within this manual for detailed identification.
Motherboard Specifications
The Gigabyte B650 Gaming X AX boasts a standard ATX form factor, measuring 8;9 x 9.6 inches (226 x 244 mm). It supports AMD Ryzen 5000 Series/ Ryzen 7000 Series Desktop Processors (refer to the CPU support list on Gigabyte’s website for compatibility). The chipset is, of course, the AMD B650. It features four DDR5 DIMM slots, capable of supporting up to 128GB of memory.
Storage options include 2 x M.2 connectors and 4 x SATA 6Gb/s connectors. Expansion slots comprise 1 x PCIe 5.0 x16, 1 x PCIe 4.0 x16 (running at x4), and 1 x PCIe 3.0 x1 slot. The rear panel I/O includes USB 3.2 Gen 2 ports, audio jacks, and video outputs. It also incorporates a 256Mb flash ROM for BIOS storage, enabling easy updates and customization.
CPU Installation Guide
Before installing your AMD Ryzen processor onto the Gigabyte B650 Gaming X AX, ensure the motherboard is powered off and disconnected from the power supply. Carefully open the CPU socket lever. Align the processor with the socket, matching the golden triangle on the CPU with the corresponding marker on the socket. Gently place the CPU into the socket – do not force it!
Once seated correctly, close the socket lever, securing the CPU in place. Apply thermal paste to the CPU’s integrated heat spreader (IHS) if your cooler doesn’t have pre-applied paste. Finally, install your CPU cooler, ensuring it’s firmly attached and makes good contact with the CPU. Connect the cooler’s fan cable to the designated CPU fan header on the motherboard.
Memory (RAM) Installation and Compatibility
Installing memory (RAM) on your Gigabyte B650 Gaming X AX is straightforward. First, ensure the system is powered off. Locate the DIMM slots on the motherboard – typically color-coded. Open the retaining clips on both ends of the slots you intend to use. Align the notch on the RAM module with the notch in the DIMM slot.
Press down firmly and evenly on both ends of the RAM module until the retaining clips click into place. Consult the motherboard manual for optimal slot population for dual-channel or quad-channel configurations. The B650 Gaming X AX supports various DDR5 memory speeds; check the QVL (Qualified Vendor List) on Gigabyte’s website for tested and compatible modules.
Supported Memory Types and Speeds
The Gigabyte B650 Gaming X AX motherboard exclusively supports DDR5 memory modules. It’s designed to maximize performance with the latest generation of RAM technology. Officially, the board supports memory speeds up to 6400MHz and beyond, depending on the CPU and memory module capabilities, through AMD EXPO and XMP profiles.
However, achieving these speeds requires compatible memory kits listed on Gigabyte’s Qualified Vendor List (QVL). The QVL ensures tested compatibility and stability. Lower speeds, such as 4800MHz or 5200MHz, are also supported, offering a more budget-friendly option. Always refer to the motherboard manual and the QVL for the most accurate and up-to-date information regarding supported memory specifications.
Dual-Channel vs. Quad-Channel Configuration
The Gigabyte B650 Gaming X AX motherboard supports a dual-channel memory architecture. This means that for optimal performance, memory modules should be installed in pairs. Utilizing two memory modules allows the CPU to access data from both simultaneously, effectively doubling the memory bandwidth compared to a single-channel configuration.
Quad-channel configuration is not supported on this platform; it’s typically reserved for higher-end desktop platforms. To enable dual-channel mode, install the memory modules in the designated DIMM slots as indicated in the motherboard manual – usually slots A2 and B2, or A1 and B1. Proper installation is crucial for realizing the performance benefits of dual-channel memory.
BIOS Setup and Configuration
Accessing the BIOS on your Gigabyte B650 Gaming X AX is achieved by pressing the designated key – typically Delete, F2, or F12 – during the system’s startup sequence. The specific key is usually displayed briefly on the screen during the Power-On Self-Test (POST). Once inside the BIOS interface, you can configure various system settings.
The BIOS offers extensive customization options, including boot order prioritization, hardware monitoring, and performance tuning. Careful adjustment of these settings can optimize system stability and responsiveness. A 256MB flash memory chip stores the BIOS parameters. Remember to save any changes before exiting the BIOS to ensure they are applied upon reboot.
Accessing the BIOS Interface
Entering the BIOS setup for the Gigabyte B650 Gaming X AX motherboard requires precise timing during system boot. Power on your computer and repeatedly press the designated key – commonly the Delete key – as soon as the Gigabyte logo appears. This initiates the BIOS interface loading process.
If the timing is missed, the system will proceed to boot into the operating system, and you’ll need to restart the process. The BIOS interface presents a menu-driven environment for configuring hardware settings. Familiarize yourself with the layout and navigation keys (arrow keys, Enter, Esc) to efficiently manage system parameters. A successful entry grants access to crucial system controls.

Key BIOS Settings for Performance
Optimizing performance within the Gigabyte B650 Gaming X AX BIOS involves several key settings. XMP (Extreme Memory Profile) enables pre-configured memory speeds, boosting RAM performance. Adjusting CPU core ratios and voltages (with caution!) can unlock additional processing power. Enabling Resizable BAR enhances GPU performance by allowing the CPU to access the entire GPU memory.
Fan control settings, accessible via “Smart Fan 5,” allow customization of fan curves for optimal cooling and noise balance. Prioritize “Normal” or “Silent” profiles for quieter operation, or “Manual” for precise control. Carefully monitor temperatures after making adjustments. Incorrect voltage settings can cause instability; proceed cautiously and research optimal values for your CPU.

Connecting Storage Devices (SATA & M.2)
The Gigabyte B650 Gaming X AX motherboard offers versatile storage options. SATA ports support traditional 2.5” and 3.5” hard drives and SSDs. Connect these using SATA cables, ensuring proper alignment with the port numbering. For significantly faster speeds, utilize the M.2 slots, supporting PCIe NVMe SSDs. Consult the motherboard manual for compatible M.2 lengths and supported PCIe generations.
M.2 SSDs install directly onto the board, secured with a small screw. Prioritize the M.2 slot with direct CPU lane access for maximum performance. During installation, ensure static discharge precautions are followed. The BIOS automatically detects connected storage devices; however, you may need to configure boot order within the BIOS settings.
Fan Control and Cooling Solutions
Effective cooling is crucial for maintaining optimal system performance. The Gigabyte B650 Gaming X AX provides multiple fan headers to connect CPU coolers, case fans, and potentially liquid cooling pumps. Within the BIOS, you can precisely configure fan curves, adjusting fan speeds based on temperature sensors. Options typically include ‘Normal,’ ‘Silent,’ and ‘Manual’ modes.
Manual mode allows for custom fan speed adjustments at specific temperature thresholds. Monitoring CPU and system temperatures is vital when setting fan curves. Incorrect settings can lead to overheating or excessive noise. Ensure proper airflow within your case by strategically positioning fans for intake and exhaust. Addressing CPU fan speed problems often involves BIOS adjustments or verifying fan connections.

Configuring Fan Curves in BIOS
Accessing the Smart Fan 5 feature within the BIOS allows granular control over your system’s cooling. You’ll define temperature thresholds and corresponding fan speeds for each connected fan. Start by selecting the fan header you wish to configure. Then, establish multiple points on the fan curve – for example, 30°C at 30% fan speed, 60°C at 60%, and 80°C at 100%.
Experiment with these settings to find a balance between cooling performance and noise levels. Remember to save your changes after configuring each fan curve. If a CPU fan persistently runs at maximum speed despite BIOS adjustments, check the fan’s connection and consider a different fan header. Proper curve configuration prevents overheating and extends component lifespan.
Rear Panel I/O Connections
The Gigabyte B650 Gaming X AX rear panel offers a comprehensive array of connectivity options. You’ll find USB ports, including USB 3.2 Gen 1 and Gen 2, for high-speed data transfer. Dedicated ports support audio input/output, and a PS/2 port remains for legacy devices. Video outputs include DisplayPort and HDMI, enabling connection to modern displays.
An Ethernet port provides a stable network connection, while Wi-Fi antennas connect wirelessly. Carefully consult the motherboard diagram in the manual to identify each port’s specific function. Proper connection ensures optimal performance of peripherals and networking capabilities. Always refer to device manuals for compatible port types.
Front Panel Connector Guide
Connecting the front panel connectors to the Gigabyte B650 Gaming X AX requires careful attention to the motherboard manual’s diagram. These connectors include power switch, reset switch, power LED, and HDD LED. Incorrect connections can prevent the system from powering on or displaying proper status indicators.
The manual details the pin assignments for each connector, ensuring accurate placement. Pay close attention to polarity for LEDs – reversed polarity will prevent them from illuminating. USB and audio connectors also reside on the front panel header. Double-check all connections before powering on the system to avoid potential damage or functionality issues.
PCIe Slot Configuration
The Gigabyte B650 Gaming X AX motherboard features multiple PCIe slots for graphics cards, expansion cards, and high-speed storage devices. The manual details the lane configuration for each slot, indicating bandwidth availability (x16, x8, x4, x1). Prioritize the primary PCIe x16 slot for your graphics card to ensure maximum performance.
When installing multiple devices, understand how lane sharing affects bandwidth. The manual clarifies how the PCIe lanes are allocated based on installed components. Proper configuration is crucial for optimal performance, especially when using multiple high-bandwidth devices. Refer to the motherboard diagram to identify each slot and its corresponding lane configuration for seamless expansion.
Troubleshooting Common Issues
This section addresses frequent problems encountered with the Gigabyte B650 Gaming X AX. Common issues include CPU fan speed irregularities, where the fan operates at maximum speed despite BIOS settings. Solutions involve checking fan control modes (Normal, Silent, Manual) and ensuring proper BIOS configuration; Boot issues are also covered, suggesting a review of boot order, connected devices, and potential hardware conflicts.
The manual guides users through diagnosing and resolving these problems, offering step-by-step instructions. It also suggests checking for BIOS updates, as these often contain fixes for known issues; If problems persist, consulting the Gigabyte support forum or contacting technical support is recommended for further assistance.

Addressing CPU Fan Speed Problems
If your CPU fan consistently runs at maximum speed on the Gigabyte B650 Gaming X AX, several troubleshooting steps can be taken. First, access the BIOS and navigate to the fan control settings. Ensure the fan control mode isn’t locked or set incorrectly. Cycle through “Normal,” “Silent,” and “Manual” modes to see if adjustments impact speed.
Verify the fan is connected to the correct CPU fan header on the motherboard. A faulty fan or incorrect BIOS configuration can cause this issue. Consider updating the motherboard’s BIOS to the latest version, as updates often include fan control improvements. If the problem persists, test with a different CPU fan to isolate the issue.
Resolving Boot Issues
Encountering boot problems with your Gigabyte B650 Gaming X AX motherboard requires systematic troubleshooting. Begin by verifying all power connections to the motherboard, CPU, and graphics card are secure. Ensure RAM modules are correctly seated in the appropriate slots, following the dual-channel configuration guidelines. A single RAM module can help isolate issues.
Clear the CMOS by using the CLR_CMOS jumper on the motherboard, restoring BIOS settings to default. Check for any POST (Power-On Self-Test) codes displayed on the motherboard, which can indicate the source of the problem. If a new component was recently installed, remove it to see if it resolves the boot failure. A minimal boot configuration (CPU, RAM, GPU) can aid diagnosis.
Software Installation and Drivers
Proper software and driver installation is crucial for optimal Gigabyte B650 Gaming X AX performance. Begin by installing the chipset drivers from the Gigabyte support website, ensuring compatibility with your operating system. Next, install the audio, LAN, and USB drivers, followed by any necessary drivers for integrated graphics (if applicable).

Gigabyte often provides utility software like App Center, which simplifies driver updates and system monitoring. Regularly check the Gigabyte website for the latest driver versions to benefit from bug fixes and performance improvements. Avoid using third-party driver update tools, as they can sometimes install incompatible or unstable drivers. A clean driver installation is recommended after a major system change.
Warranty Information and Support
Gigabyte provides a standard warranty for the B650 Gaming X AX motherboard, typically ranging from one to three years, depending on the region and retailer. The warranty covers defects in materials and workmanship under normal use. Damage caused by improper installation, overclocking, or physical abuse is generally not covered.
To initiate a warranty claim, contact Gigabyte’s customer support through their official website or authorized service centers. Retain your proof of purchase (invoice or receipt) as it’s required for warranty validation. Gigabyte’s website offers extensive support resources, including FAQs, troubleshooting guides, and driver downloads. For further assistance, explore the Gigabyte community forums where users share solutions and experiences.
Safety Precautions and ESD Handling
Prioritize safety when handling the Gigabyte B650 Gaming X AX motherboard. Always disconnect the power supply from the wall outlet before installing or removing any components. Electrostatic Discharge (ESD) can severely damage sensitive electronic parts. Utilize an anti-static wrist strap grounded to the chassis to prevent ESD buildup.
Work in a static-free environment, avoiding carpets and synthetic materials. Handle components by their edges, never touching the gold connector pins or integrated circuits. Ensure proper ventilation to prevent overheating during operation. Do not attempt to repair the motherboard yourself; contact qualified technicians for any complex issues. Follow all local electrical safety regulations.