
Embarking on a Crown Vic manual transmission swap offers a thrilling driving experience; This project transforms a comfortable cruiser into a more engaging, performance-oriented machine, appealing to enthusiasts.
Why Swap to a Manual Transmission?
The allure of swapping to a manual transmission in a Crown Vic stems from a desire for enhanced driver engagement and control. Many enthusiasts find the automatic transmission disconnects them from the driving experience, lacking the direct feel and responsiveness a manual gearbox provides. A manual swap allows for precise gear selection, enabling better control during spirited driving and cornering.
Furthermore, a manual transmission can potentially unlock modest performance gains by eliminating the parasitic losses inherent in a torque converter. While not a massive horsepower boost, it contributes to a more efficient powertrain. The swap also caters to a preference for a more traditional driving experience, appealing to those who enjoy the skill and satisfaction of mastering a manual gearbox. Ultimately, it’s about tailoring the Crown Vic to a more personalized and dynamic driving style, moving beyond its original comfort-focused design.
Overview of the Project
A Crown Vic manual transmission swap is a moderately complex undertaking, requiring mechanical skill, patience, and a dedicated workspace. It’s not a simple bolt-in procedure; significant modifications are necessary. The project fundamentally involves removing the automatic transmission, installing a manual transmission, and adapting the vehicle’s systems to accommodate the change.
Key areas of focus include sourcing compatible parts – transmission, pedal assembly, clutch components, and a suitable driveshaft. Modifications to the wiring harness are essential for disabling automatic transmission-related systems. Expect to address the floorboard for pedal installation and potentially modify the transmission tunnel for clearance. Careful planning and research are crucial, as compatibility issues can arise. This swap transforms a largely automated system into a driver-controlled one, demanding a thorough understanding of automotive mechanics.

Parts Required for the Swap
Successful completion demands a comprehensive parts list: a donor transmission, pedal assembly, clutch kit, flywheel, shifter, modified driveshaft, and wiring harness components are essential.
Donor Vehicle Selection (T5, TKO, etc.)
Choosing the right donor vehicle is paramount for a successful Crown Vic manual transmission swap. Several transmissions are viable options, each with its strengths and weaknesses. The Ford T5, commonly found in 1983-2001 Mustangs, is a popular and relatively affordable choice, offering good strength for moderate power levels. However, it may require adapter fittings.
For increased durability and the ability to handle higher horsepower, the Tremec TKO series (TKO 500, TKO 600) is an excellent upgrade. These transmissions are known for their robust construction and precise shifting feel, but come at a higher cost. Another option is the World Class T5, offering improvements over the earlier T5 models.
Consider the vehicle’s intended use when selecting a transmission. A daily driver might benefit from the affordability of a T5, while a performance-focused build would likely warrant the investment in a TKO. Researching gear ratios available in each transmission is also crucial to ensure optimal performance for your Crown Vic.
Transmission Options and Gear Ratios
Selecting appropriate gear ratios is critical for maximizing the potential of your Crown Vic manual swap. The factory automatic transmission’s ratios differ significantly from those typically found in manual transmissions. Consider your driving style and intended use – street, highway, or track – when making your decision.

For a T5 transmission, common ratios include 3.35:1 first gear, suitable for street driving and maintaining reasonable fuel economy. A TKO 500 often features ratios like 2.87:1 or 3.27:1, offering a balance between acceleration and cruising. The TKO 600 provides even stronger gearing options, potentially including a 2.88:1 or 3.55:1 first gear.
Overdrive ratios are equally important. A 0.64:1 or 0.82:1 overdrive allows for comfortable highway cruising and reduced engine wear. Matching the transmission’s final drive ratio to your Crown Vic’s rear end gear ratio is essential for optimal performance and drivability. Careful planning ensures a well-rounded and enjoyable driving experience.
Pedal Assembly and Master Cylinder
Installing a proper pedal assembly is fundamental to a successful Crown Vic manual transmission swap. Since these cars didn’t originally come with a manual pedal setup, sourcing a complete assembly is crucial. Mustang or T-Bird pedal assemblies are frequently used due to their compatibility and availability.
The pedal assembly includes the clutch pedal, brake pedal, and often a provision for the master cylinder. Selecting a compatible master cylinder is equally important. A hydraulic clutch system requires a master cylinder specifically designed for clutch operation, differing from brake master cylinders.
Proper mounting of the pedal assembly requires fabrication or the use of aftermarket brackets. Ensure adequate clearance for the pedals’ travel and consider ergonomics for comfortable operation. Bench bleeding the master cylinder before connecting the hydraulic lines is vital to remove air and ensure proper clutch engagement.
Clutch Kit (Disc, Pressure Plate, Throwout Bearing)
Selecting the correct clutch kit is paramount for a reliable and enjoyable Crown Vic manual transmission swap. The kit comprises the clutch disc, pressure plate, and throwout bearing – each component playing a vital role in transferring power. Consider the engine’s torque output when choosing a clutch; higher horsepower demands a more robust setup.
The clutch disc’s diameter must match the transmission’s input shaft spline count and size. The pressure plate clamps the disc against the flywheel, and its clamping force dictates pedal effort. A heavier-duty pressure plate is beneficial for modified engines.
The throwout bearing (release bearing) disengages the clutch when the pedal is pressed. Ensure it’s compatible with the transmission and properly lubricated during installation. High-quality kits often include alignment tools to ensure correct disc centering during transmission installation, preventing alignment issues.
Flywheel Selection
Choosing the right flywheel is crucial for a successful Crown Vic manual transmission swap. Unlike the automatic flexplate, a manual flywheel provides a friction surface for the clutch and rotational mass for smoother engine operation. Flywheel weight significantly impacts drivability; lighter flywheels offer quicker revving but can make the car more challenging to drive smoothly at low speeds.
Consider the transmission’s bolt pattern and crankshaft flange compatibility. A steel flywheel is generally preferred for its durability and heat dissipation capabilities, especially with performance applications. Some flywheels are designed for specific clutch setups, ensuring optimal engagement.
Dual-friction flywheels offer enhanced clamping force and improved heat management, ideal for higher horsepower builds. Ensure the flywheel is balanced to prevent vibrations. Proper flywheel preparation, including cleaning and resurfacing, is essential for optimal clutch performance and longevity.
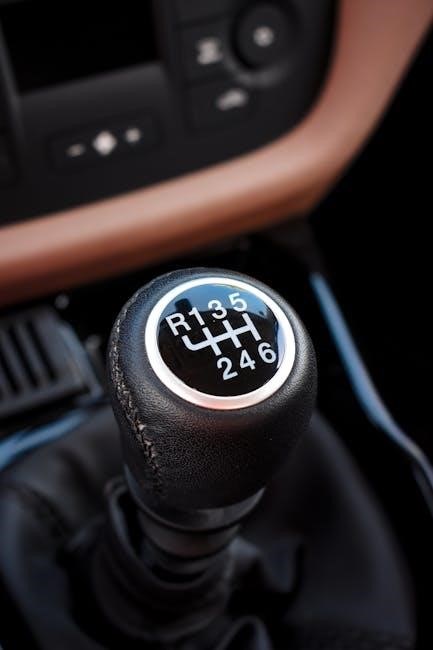
Shifter and Shifter Linkage
Selecting the appropriate shifter and linkage is vital for a precise and enjoyable driving experience after a Crown Vic manual transmission swap. Numerous options exist, ranging from stock-style shifters to short-throw performance upgrades. Consider your driving preferences and intended use when making your choice.
The shifter must be compatible with the chosen transmission (T5, TKO, etc;). Linkage options include cable-operated or direct-linkage systems. Cable systems offer flexibility in shifter placement, while direct linkage provides a more direct feel.
Proper adjustment of the shifter linkage is critical to ensure accurate gear selection. Sloppy linkage can lead to missed shifts or difficulty engaging certain gears. After installation, carefully adjust the linkage to achieve smooth, precise shifts. Bushing replacement within the linkage can further refine the feel and eliminate play.
Driveshaft Modification or Replacement
After a Crown Vic manual transmission swap, addressing the driveshaft is almost always necessary. The original automatic transmission driveshaft’s length will likely be incorrect for the manual transmission’s output shaft location. This discrepancy requires either modification or complete replacement.
Measuring the required driveshaft length is crucial for proper operation. Incorrect length can cause vibrations, driveline stress, and premature component failure. A professional driveshaft shop is highly recommended for accurate measurement and modification or fabrication.
Consider the U-joint angles when determining the driveshaft configuration. Excessive angles can contribute to vibrations. A driveshaft with the correct length and U-joint angles ensures smooth power delivery and minimizes stress on the transmission and rear differential. Upgrading to a stronger driveshaft is advisable for increased performance.
Wiring Harness Modifications
The Crown Vic manual transmission swap necessitates careful wiring harness modifications. Removing the automatic transmission leaves unused wires that must be addressed, and new connections are required for the manual transmission’s features. The park/neutral safety switch wiring is a primary concern, needing to be integrated with the clutch switch for starting functionality.
Reverse light wiring also requires attention. The automatic transmission’s reverse switch must be bypassed and wired to a switch activated by the manual transmission’s reverse gear. Additionally, the transmission control module (TCM) wiring should be cleanly disconnected and secured to prevent issues.
A wiring diagram specific to both the Crown Vic and the chosen manual transmission is invaluable. Proper soldering and heat-shrinking connections are essential for reliability. Consider a standalone aftermarket solution for managing these connections, ensuring a clean and functional installation.

Installation Process
The installation demands meticulous work, beginning with automatic transmission removal and progressing through manual transmission mounting, clutch setup, and linkage adjustments for smooth operation.
Removing the Automatic Transmission
Begin by disconnecting the driveshaft at the rear axle, carefully supporting the transmission with a jack. Disconnect all electrical connectors and cooler lines attached to the automatic transmission. Prioritize labeling each connector to simplify reassembly later. Next, remove the shift linkage and any brackets securing the transmission to the vehicle’s frame.
Support the engine from above to prevent tilting when the transmission is removed. Unbolt the torque converter from the flexplate, ensuring it slides freely. Slowly lower the transmission, guiding it away from the engine and exhaust system. This step often requires patience and maneuvering. Once clear, carefully roll the automatic transmission out from under the vehicle. Inspect the flexplate for any damage or cracks before proceeding with the manual transmission installation. Remember safety glasses and gloves throughout this process!
Installing the Manual Transmission and Clutch
Begin by carefully aligning the clutch disc with the pilot bearing in the flywheel. Gently slide the clutch assembly onto the flywheel, ensuring it sits flush. Install the transmission using a transmission jack, slowly guiding it into position, aligning the input shaft with the clutch disc.
Bolting the transmission to the engine requires patience; start a few bolts loosely before fully tightening them in a crisscross pattern. Double-check alignment throughout this process. Once secured, install the flywheel, ensuring proper torque specifications are followed. Finally, connect the clutch master cylinder to the transmission, bleeding the system to remove any air bubbles. Verify proper clutch pedal feel before proceeding further. A properly installed clutch is crucial for smooth shifting and reliable operation.
Pedal Assembly Installation
Installing the manual pedal assembly requires careful preparation and attention to detail. Begin by removing the existing automatic brake pedal. The manual assembly typically involves a clutch pedal and a modified brake pedal, often requiring drilling new mounting holes in the firewall. Ensure proper alignment and secure mounting to prevent movement during operation.
Connect the clutch pedal to the clutch master cylinder, ensuring the linkage operates smoothly without binding. Adjust the pedal height and travel to achieve a comfortable and responsive feel. Thoroughly inspect all connections and fasteners, tightening them to the manufacturer’s specifications. Proper pedal installation is vital for safe and efficient clutch engagement and overall driving experience. Double-check for any obstructions before proceeding.

Driveshaft Installation and Adjustment
With the transmission secured, installing the driveshaft is the next crucial step. Verify the driveshaft length is correct for the manual transmission setup; modifications or a custom driveshaft may be necessary. Carefully slide the driveshaft into place, ensuring it properly engages with both the transmission output shaft and the rear differential.
Secure the driveshaft using the appropriate U-bolts and hardware, tightening them to the specified torque. Check for proper driveline angles to minimize vibrations; shims may be required at the rear differential. Confirm sufficient clearance between the driveshaft and the vehicle’s undercarriage components. After installation, thoroughly inspect all connections and test drive the vehicle, listening for any unusual noises or vibrations that may indicate alignment issues.
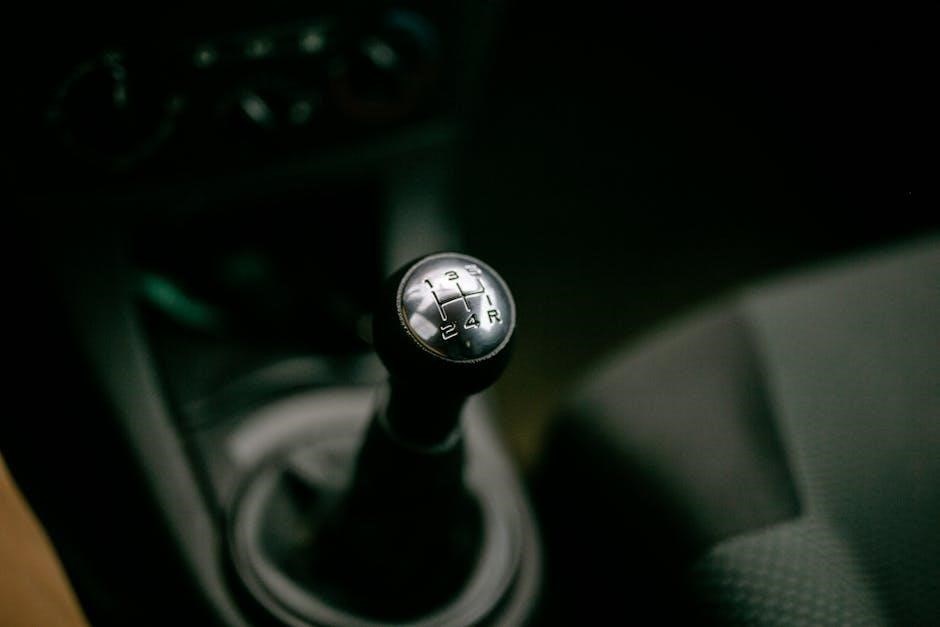
Shifter Installation and Adjustment
Installing the shifter involves mounting it securely within the cabin, typically utilizing existing console openings or requiring minor modifications. Connect the shifter linkage to the transmission, ensuring proper alignment and smooth operation. Precise adjustment of the linkage is vital for accurate gear selection; misadjustment can lead to difficulty shifting or even damage to the transmission.
Carefully follow the shifter manufacturer’s instructions for linkage adjustment. Test each gear, verifying that the shifter moves freely and engages each gear positively. Fine-tune the linkage until smooth, precise shifts are achieved. Consider the throw length and feel of the shifter; some shifters offer adjustable settings; A properly installed and adjusted shifter is essential for an enjoyable manual driving experience.

Post-Swap Considerations
After the swap, prioritize fluid checks and potential troubleshooting; Enjoy the enhanced driving dynamics and explore the performance gains achieved through this conversion!
Fluid Recommendations
Selecting the correct fluids is crucial for the longevity and smooth operation of your newly swapped manual transmission. For the transmission itself, a high-quality GL-5 gear oil with a viscosity of 75W-90 is generally recommended. This weight provides excellent protection across a wide range of temperatures, vital for both daily driving and spirited performance. Avoid GL-4 gear oil, as it may not offer sufficient protection for the materials used in many aftermarket transmissions.
The clutch hydraulic system requires a DOT 3 or DOT 4 brake fluid. Ensure the fluid is fresh and free of contaminants to maintain optimal pedal feel and clutch engagement. Regular fluid changes – every 2-3 years – are highly advised. Finally, don’t forget the rear differential! Use a 75W-90 GL-5 gear oil, similar to the transmission, to ensure proper lubrication and prevent premature wear. Always consult the specific recommendations of your transmission and differential manufacturers for the most accurate fluid specifications.

Troubleshooting Common Issues
Post-swap, several issues can arise. Difficulty shifting often points to improper clutch adjustment, air in the hydraulic lines, or a worn clutch master/slave cylinder. Grinding gears suggests incomplete clutch disengagement or synchronization problems within the transmission. Investigate the shifter linkage for looseness or misalignment if shifts feel vague.
Unusual noises – whining, clunking – could indicate low transmission fluid, worn bearings, or driveshaft imbalances. Vibrations often stem from a poorly balanced driveshaft or worn U-joints. If the clutch pedal feels spongy, bleed the hydraulic system thoroughly. A persistent clutch slipping issue necessitates inspecting the clutch disc and pressure plate for wear or contamination. Remember to double-check all connections and fluid levels before diving into more complex diagnostics. A methodical approach is key to resolving these common post-swap challenges.
Potential Performance Gains
A manual transmission swap on a Crown Vic unlocks noticeable performance improvements. Drivers gain precise gear control, leading to quicker acceleration and more engaging handling. Removing the torque converter’s parasitic loss boosts horsepower delivery to the rear wheels, resulting in a more responsive feel. Lower weight, due to the removal of the automatic transmission components, further enhances agility.
Selecting appropriate gear ratios within the manual transmission can optimize performance for specific driving styles – tighter ratios for spirited driving or taller ratios for improved highway cruising. The ability to hold gears longer during acceleration maximizes engine power. While not transforming the Crown Vic into a sports car, the swap significantly elevates its driving dynamics, offering a more connected and enjoyable experience for enthusiasts seeking greater control and responsiveness.