
Honeywell VisionPro 8000 Thermostat Manual: A Comprehensive Guide
This comprehensive manual details the Honeywell VisionPro 8000’s operation, installation, and troubleshooting, offering a 150-page guide with PDF resources readily available online.
Welcome to the Honeywell VisionPro 8000, a sophisticated thermostat designed for optimal home comfort and energy efficiency. This thermostat offers electronic control of 24 VAC single-stage heating and cooling systems, featuring a user-friendly touchscreen interface for intuitive operation.
This manual serves as your guide to understanding and utilizing the full potential of your new thermostat. Whether you’re a homeowner or a professional installer, you’ll find detailed instructions covering installation, programming, operation, and troubleshooting. Resources like installation guides and user manuals are available in PDF format, totaling over a million documents from more than 10,000 brands.
The VisionPro 8000, including models like TH8110U, provides advanced features such as Smart Response technology and filter change reminders, enhancing both convenience and system performance. This manual will ensure a successful setup and long-term enjoyment of your Honeywell thermostat.
Understanding the Key Features
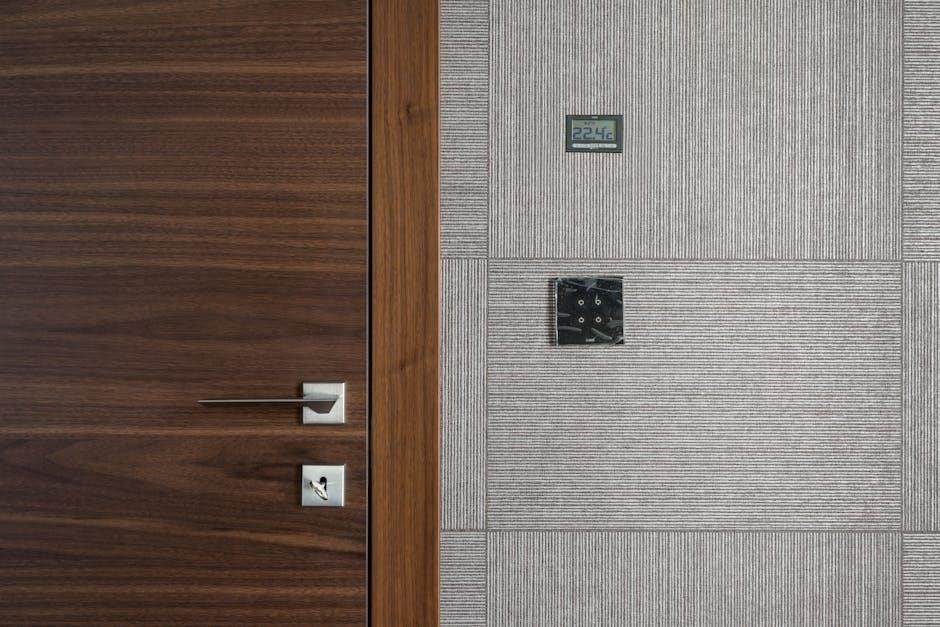
The Honeywell VisionPro 8000 boasts a range of features designed for comfort and control. Its prominent touchscreen interface simplifies navigation and programming, offering both 7-day and non-programmed scheduling options.
Smart Response technology intelligently learns your heating and cooling patterns, optimizing system performance for consistent temperatures. Filter change reminders ensure optimal air quality and system efficiency, while customizable humidity control settings enhance indoor comfort.
Furthermore, flexible fan control options allow you to circulate air as needed. The thermostat supports single-stage heating and cooling, and detailed PDF manuals (spanning up to 96 pages) provide comprehensive guidance. Access to these resources, alongside installation instructions, empowers users to maximize the benefits of their VisionPro 8000 system.

Installation Guide
Detailed PDF installation instructions, spanning 12 pages, are available for the Honeywell VisionPro 8000, guiding users through wiring and mounting procedures effectively.
Unpacking and Component Check
Upon receiving your Honeywell VisionPro 8000 thermostat, carefully unpack the box and verify all components are present. The package should include the thermostat unit itself, a mounting baseplate, screws for secure installation, and this comprehensive user manual – available in PDF format.
Inspect each item for any signs of damage incurred during shipping. If any parts are missing or appear damaged, immediately contact the retailer or Honeywell support for assistance. Do not attempt to install a damaged component. Familiarize yourself with the thermostat’s touchscreen display and the baseplate’s wiring terminals before proceeding.
Retain the original packaging for potential future returns or warranty claims. A thorough component check ensures a smooth and successful installation process, maximizing the lifespan and performance of your new thermostat.
Wiring Diagrams for Heating Systems
The Honeywell VisionPro 8000 supports various heating system configurations. Carefully consult the wiring diagrams provided in the installation guide (available as a PDF) to ensure correct connections. Common heating system wiring includes connections for 24VAC power (Rh, C), heating control (W), and potentially a common wire for enhanced functionality.
Diagrams illustrate wiring for single-stage heating, alongside options for systems with a heat pump or auxiliary heat. Incorrect wiring can damage the thermostat or your heating system, so precision is crucial. Always disconnect power to the HVAC system at the breaker before commencing any wiring work.
If you are unfamiliar with electrical wiring, consult a qualified HVAC technician. The manual provides detailed schematics to guide you through the process safely and effectively.
Wiring Diagrams for Cooling Systems
The Honeywell VisionPro 8000 accommodates diverse cooling system setups. Refer to the detailed wiring diagrams within the installation PDF to guarantee accurate connections. Standard cooling system wiring involves connections for 24VAC power (Rh, C), cooling control (Y), and potentially a common wire for optimal performance.
Diagrams illustrate wiring for single-stage cooling, alongside configurations for heat pumps offering both cooling and heating functionalities. Incorrect wiring can lead to system malfunction or damage, emphasizing the need for meticulous attention. Always disconnect power at the breaker before initiating any wiring procedures.
If you lack experience with electrical work, seek assistance from a certified HVAC professional. The manual’s schematics provide clear guidance for safe and effective installation.
Mounting the Thermostat Base
Before wiring, securely mount the Honeywell VisionPro 8000’s baseplate to the wall. Utilize the provided mounting screws and anchors, ensuring a level and stable installation. The baseplate should be positioned in a location representative of the room’s average temperature, away from direct sunlight, drafts, or heat-generating appliances.
Mark the screw locations using the baseplate as a template. Drill pilot holes if necessary, especially when mounting to drywall. Carefully align the baseplate with the holes and fasten it securely to the wall.
Verify the baseplate is firmly attached before proceeding with wiring. A loose baseplate can cause connection issues and affect thermostat functionality.
Connecting the Wiring
With the baseplate mounted, carefully connect the wiring according to your specific HVAC system’s configuration. Refer to the detailed wiring diagrams provided in the manual for heating and cooling systems; Ensure the power to your HVAC system is completely OFF at the breaker before handling any wires.
Identify the wires corresponding to each terminal (R, C, W, Y, G, etc.) and securely insert them into the appropriate terminals on the thermostat base. Double-check all connections to prevent shorts or malfunctions.
Gently tug on each wire to confirm it’s firmly seated in the terminal. Incorrect wiring can damage the thermostat or your HVAC system.
Operating Instructions
The VisionPro 8000 features a touchscreen interface for intuitive control, allowing users to easily adjust settings, program schedules, and manage temperature preferences.
Navigating the Touchscreen Interface
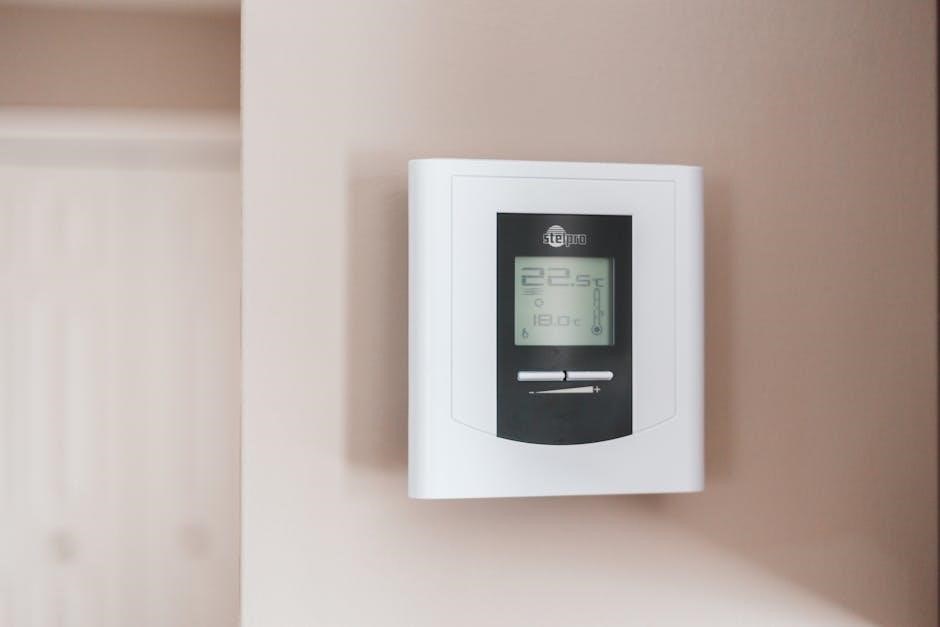
The Honeywell VisionPro 8000 boasts a user-friendly touchscreen interface designed for simple and intuitive operation. Upon activation, the main screen displays current temperature, setpoint, and operating mode. Swiping left or right navigates between different screens, including scheduling, settings, and fan control.
Tapping icons provides access to specific functions; for example, the ‘Menu’ icon reveals advanced options. The interface utilizes clear visual cues and prompts to guide users through various settings. Adjusting temperature is achieved by directly tapping the up or down arrows displayed on the screen.
To access scheduling options, select the ‘Schedule’ icon, allowing for customized 7-day or non-programmed settings. The touchscreen is responsive and designed for easy interaction, even with minimal technical expertise. Familiarizing yourself with the icon layout will streamline your control experience.
Setting the Date and Time
Accurate date and time settings are crucial for proper scheduling and operation of your Honeywell VisionPro 8000 thermostat. To configure these settings, navigate to the ‘Menu’ icon on the touchscreen interface. Within the menu, select ‘Settings’ and then ‘Date/Time’.
You’ll be presented with options to adjust the month, day, and year. Use the up and down arrows to select the correct values. Similarly, adjust the hour and minute to reflect the current time. Ensure you correctly set the AM/PM designation.
After making adjustments, select ‘Save’ or ‘Apply’ to confirm the changes. The thermostat will then utilize the new date and time for all scheduled events and display accurate time information. Incorrect settings can disrupt programmed schedules, so verification is recommended.
Programming Schedules (7-Day & Non-Programmed)
The Honeywell VisionPro 8000 offers flexible scheduling options, including both 7-day programmable and non-programmed modes. To access scheduling, select ‘Schedule’ from the main menu on the touchscreen. You can choose between a 7-day schedule, allowing unique settings for each day of the week, or a non-programmed mode for consistent temperature control.
Within the 7-day schedule, you can define multiple periods per day (e.g., Wake, Leave, Return, Sleep) with specific temperature settings for each. Adjust the start time and temperature for each period to match your lifestyle. The non-programmed mode maintains a single setpoint continuously.
Remember to ‘Save’ your schedule after making changes. Proper scheduling maximizes energy efficiency and comfort.
Adjusting Temperature Settings
The Honeywell VisionPro 8000 allows for easy temperature adjustments via its intuitive touchscreen interface. From the main screen, you can directly increase or decrease the setpoint temperature using the up and down arrow buttons. The current set temperature is prominently displayed. You can also access temperature settings through the ‘Menu’ and then selecting ‘Temperature’.
The thermostat supports both heating and cooling setpoints. Ensure the system mode (Heat, Cool, Auto, Off) is correctly selected before adjusting the temperature. In ‘Auto’ mode, the thermostat automatically switches between heating and cooling to maintain the desired temperature.
Temporary adjustments can be made using the ‘Hold’ function, overriding the programmed schedule.
Using the Hold Function
The Honeywell VisionPro 8000’s ‘Hold’ function allows you to temporarily override the programmed schedule, maintaining a consistent temperature. To activate ‘Hold’, navigate to the main screen and select the ‘Hold’ button. You’ll then be prompted to enter the desired temperature. The thermostat will maintain this temperature indefinitely until you cancel the ‘Hold’.
There are typically two ‘Hold’ options: ‘Temporary Hold’ and ‘Permanent Hold’. ‘Temporary Hold’ maintains the set temperature until the next scheduled program change. ‘Permanent Hold’ continues until manually cancelled.
To cancel ‘Hold’, simply return to the main screen and select ‘Cancel Hold’ or revert to the scheduled program via the ‘Menu’ options.
Advanced Features
The VisionPro 8000 boasts Smart Response, filter change reminders, humidity control, and customizable fan settings for optimized comfort and efficient HVAC system management.
Smart Response Technology
Honeywell’s Smart Response technology is a key feature of the VisionPro 8000, designed to deliver heat or cool air faster than traditional thermostats. This innovative system learns the thermal characteristics of your home, anticipating how long it takes to reach a desired temperature.
Instead of simply running the HVAC system continuously until the setpoint is reached, Smart Response intelligently modulates the system, providing bursts of heating or cooling as needed. This results in quicker temperature recovery after setbacks or changes in programming.
The technology minimizes temperature swings, ensuring a more consistent and comfortable indoor environment. It also contributes to energy savings by avoiding unnecessary prolonged operation of the heating or cooling system, optimizing performance and efficiency.
Filter Change Reminders
The Honeywell VisionPro 8000 thermostat includes a convenient filter change reminder function, crucial for maintaining optimal HVAC system performance and indoor air quality. This feature proactively alerts you when it’s time to replace your air filter, preventing reduced airflow and potential system strain.
You can customize the reminder settings to align with your filter type and usage patterns. The thermostat tracks operating hours and calculates the appropriate interval for filter replacement, typically based on a set number of days or operating hours.
When the reminder activates, a notification will appear on the touchscreen display, prompting you to change the filter. Regular filter changes ensure efficient operation, lower energy bills, and a healthier home environment.
Humidity Control Settings
The Honeywell VisionPro 8000 offers advanced humidity control, allowing you to manage indoor moisture levels for enhanced comfort and health. This feature is particularly beneficial in climates with high or low humidity, preventing issues like condensation, mold growth, or dry skin.
Through the touchscreen interface, you can set desired humidity levels, typically expressed as a percentage. The thermostat then activates or deactivates the humidifier or dehumidifier (if connected to your HVAC system) to maintain the setpoint.
Adjustable settings allow for precise control, ensuring a comfortable and healthy indoor environment. Monitoring humidity levels contributes to energy efficiency and protects your home’s structure.
Fan Control Options
The Honeywell VisionPro 8000 provides versatile fan control options, optimizing air circulation and comfort within your home. Beyond simply operating with heating or cooling, the thermostat allows independent fan management through its intuitive touchscreen interface.
You can select from settings like “Auto,” where the fan runs only during heating or cooling cycles, and “On,” for continuous air circulation. Continuous fan operation can improve air mixing and distribute temperatures more evenly throughout the house.
Some models may offer additional fan settings, such as a “Circulate” mode, which periodically runs the fan to maintain consistent temperatures. These options contribute to both comfort and energy efficiency.

Troubleshooting
This section provides solutions for common issues, including error codes, power failures, temperature inaccuracies, and connectivity problems with the VisionPro 8000.
Common Error Codes and Solutions
Encountering error codes on your Honeywell VisionPro 8000 thermostat indicates a system malfunction requiring attention. While specific codes vary, understanding their meaning is crucial for effective troubleshooting.
Common issues often relate to wiring problems, sensor failures, or communication errors between the thermostat and HVAC system. A flashing display or specific alphanumeric code signals the problem. Consult the full manual (available as a PDF online) for a complete list of error codes and their corresponding solutions.
Generally, solutions involve verifying wiring connections, checking sensor functionality, or resetting the thermostat. If an error persists, professional HVAC assistance is recommended to prevent further damage or system failure. Ignoring error codes can lead to inefficient operation or complete system shutdown.
Thermostat Not Powering On
If your Honeywell VisionPro 8000 thermostat fails to power on, several potential causes need investigation.
First, verify the power supply. Check the circuit breaker controlling the HVAC system to ensure it hasn’t tripped. Next, inspect the thermostat wiring, confirming all connections are secure and haven’t become loose. A disconnected wire is a frequent culprit. Ensure the ‘C’ wire (common wire) is correctly connected, as this is essential for providing continuous power.
If wiring appears correct, the issue might be a faulty transformer within the HVAC system. Consult the full installation PDF manual for detailed wiring diagrams and troubleshooting steps. If you’re uncomfortable working with electrical components, contact a qualified HVAC technician for assistance.
Incorrect Temperature Readings
When the Honeywell VisionPro 8000 displays inaccurate temperature readings, several factors could be responsible.
Firstly, ensure the thermostat isn’t directly exposed to sunlight, drafts, or heat-generating appliances, as these can skew readings. Check for obstructions blocking airflow around the unit. Verify the thermostat is calibrated correctly; the manual details calibration procedures within the settings menu. A dirty air filter can also contribute to inaccurate readings, so ensure it’s clean.
If the problem persists, examine the wiring connections to the temperature sensor. A loose connection or damaged sensor wire can cause errors. Refer to the installation PDF for wiring diagrams. If none of these steps resolve the issue, professional HVAC assistance may be required to diagnose a potential sensor malfunction.
Connectivity Issues
If your Honeywell VisionPro 8000 experiences connectivity problems, several troubleshooting steps can be taken.
First, confirm your home’s Wi-Fi network is functioning correctly and the thermostat is within range of the router. Restart both the thermostat and your router to refresh the connection. Check the thermostat’s settings to ensure the correct Wi-Fi password has been entered. Verify that the Honeywell Home app is updated to the latest version on your smartphone or tablet.
If issues continue, consult the manual’s section on network configuration. Resetting the network settings on the thermostat might be necessary. If the thermostat was previously connected, try removing and re-adding it within the Honeywell Home app. For persistent problems, contact Honeywell support for assistance.

Technical Specifications
The VisionPro 8000 operates on 24 VAC, handles single-stage heating/cooling, and boasts a wide temperature range for optimal HVAC system compatibility.
Voltage Requirements
The Honeywell VisionPro 8000 thermostat is specifically designed to operate with 24 Volt Alternating Current (VAC) systems. This low-voltage requirement is standard for most residential heating and cooling systems, ensuring compatibility and safe operation. It’s crucial to verify your existing HVAC system’s voltage before installation to prevent damage to the thermostat or the HVAC equipment.
Attempting to power the VisionPro 8000 with a higher voltage, such as 120 VAC or 240 VAC, will cause immediate and irreversible damage. The thermostat does not include a built-in voltage transformer and relies entirely on the 24 VAC power supplied by the HVAC system’s control board. Always consult a qualified HVAC technician if you are unsure about your system’s voltage or if any modifications are needed to ensure proper power delivery.
Temperature Range
The Honeywell VisionPro 8000 thermostat is engineered to accurately monitor and control temperatures within a broad operational range. Typically, the thermostat can display ambient temperatures from approximately 32°F to 99°F (0°C to 37°C). However, the effective heating and cooling range will depend on the capabilities of your connected HVAC system.
The setpoint temperature range, which is the temperature you can program or manually adjust, usually extends from 45°F to 90°F (7°C to 32°C). While the thermostat can display temperatures outside these setpoint limits, it won’t actively control heating or cooling beyond them. Ensure your HVAC system is capable of delivering temperatures within this range for optimal comfort and efficiency.
Compatibility with HVAC Systems
The Honeywell VisionPro 8000 thermostat is designed for broad compatibility, primarily supporting 24 VAC single-stage heating and cooling systems. It effectively works with gas, oil, and electric furnaces, as well as central air conditioning units. However, it’s crucial to verify compatibility before installation, especially with more complex systems.
This thermostat generally isn’t directly compatible with line voltage systems (120V/240V) or communicating HVAC systems that utilize proprietary protocols. While it can often integrate with heat pumps, specific wiring configurations and settings may be required. Always consult a qualified HVAC technician to ensure proper and safe installation, particularly when dealing with heat pumps or zoning systems.