The Lil’ Sew & Sew, particularly models LSS-505 and LSS-202, offers a compact sewing solution. This manual guides users through operation, maintenance, and troubleshooting of these popular mini machines.
What is the Lil’ Sew & Sew?
The Lil’ Sew & Sew is a remarkably compact and portable sewing machine, often sought after for its affordability and ease of use. Commonly found as a yard sale treasure or a beginner’s first machine, it’s known by various names including the Tivax Lil Sew & Sew.
Models like the Michley LSS-505 and LSS-202 are particularly prevalent. Despite its small size, it’s capable of basic sewing operations, making it suitable for quick repairs and simple projects. It features a 6-volt motor, providing consistent power for straightforward stitching. However, its capabilities are limited compared to full-sized machines.
History and Popularity of the Lil’ Sew & Sew
The Lil’ Sew & Sew gained popularity as an accessible entry point into the world of sewing, particularly from around 2014. Its affordability and small footprint made it a common household item. Online communities, like those on Reddit (r/sewhelp and r/sewing), demonstrate continued interest and a need for support regarding these machines.
The LSS-505 and LSS-202 models, often available through retailers like Walmart and eBay, have sustained its presence in the market. Despite being considered “cheap” by some, its enduring appeal lies in its simplicity and portability, offering a basic sewing solution for many.

Understanding Your Lil’ Sew & Sew Model
Lil’ Sew & Sew machines come in variations, notably the LSS-505 and LSS-202. Identifying your specific model is crucial for correct part sourcing and operation.
Identifying Your Specific Model: LSS-505 vs. LSS-202
Determining whether you own the LSS-505 or LSS-202 is essential for finding compatible replacement parts and accessing accurate troubleshooting information. While both are compact and portable, subtle differences exist. The Michley LSS-505 appears frequently in secondhand markets, like yard sales, and is a well-regarded model.
Conversely, the Michley LSS-202 is often found at retailers like Walmart and features a 2-speed operation. Both models utilize a 6-volt motor, ensuring consistent performance. Carefully examine the machine’s label or any accompanying documentation to confirm the exact model number before proceeding with maintenance or repairs. Accurate identification streamlines the process.
Key Components and Their Functions
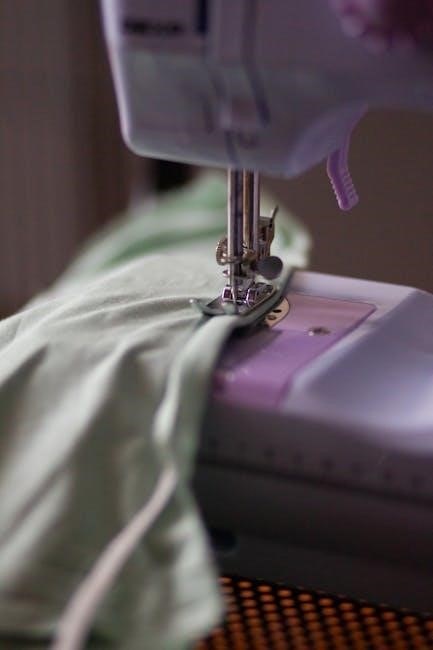
Understanding the Lil’ Sew & Sew’s components is crucial for effective operation. The needle clamp securely holds the needle, and its directionality dictates the stitch formation. The 6-volt motor provides the power for sewing, ensuring consistent performance across various fabric types.
Essential parts include the bobbin winder, responsible for filling the bobbin with thread, and the tension control, which regulates thread tightness. Familiarizing yourself with these elements allows for smoother sewing and easier troubleshooting when issues arise. Proper function of each component guarantees optimal machine performance.
Needle Clamp and Directionality
The needle clamp is a vital component, firmly securing the needle during operation. Its directionality—how the needle faces—directly impacts stitch formation and fabric penetration. A properly tightened clamp prevents needle slippage, ensuring consistent stitching.
Users have inquired about potentially changing the needle clamp’s direction, often due to issues with stitch quality. However, altering this aspect isn’t typically recommended, as it can compromise the machine’s functionality. Ensuring the correct needle type is installed is often a better solution for addressing stitching problems.
Motor Specifications (6-Volt)
The Lil’ Sew & Sew machines, including the LSS-505 and LSS-202 models, are powered by a 6-volt DC motor. This compact motor provides sufficient power for basic sewing tasks, making the machine portable and easy to use.
The 6-volt specification dictates the required power source, typically batteries or a compatible AC adapter. Consistent performance relies on maintaining the correct voltage. While reliable, the motor’s capabilities are limited to lighter fabrics and simpler projects, reflecting the machine’s overall design and intended use.
Setting Up Your Lil’ Sew & Sew
Proper setup is crucial for successful sewing. This section details how to thread the machine, wind the bobbin, and correctly install the needle for optimal performance.
Threading the Machine
Threading the Lil’ Sew & Sew requires careful attention to detail. Begin by ensuring the machine is turned off. Raise the presser foot, as this opens the tension discs. Guide the thread from the spool, through the tension assembly, and then down through the take-up lever.
Next, lead the thread through the needle clamp, ensuring it’s firmly seated. Finally, thread the needle from front to back. Incorrect threading can cause skipped stitches or tension issues, so double-check each step. A properly threaded machine is essential for smooth and consistent sewing.
Winding the Bobbin
Winding the bobbin on your Lil’ Sew & Sew is a crucial step before sewing. Place the bobbin onto the bobbin winder spindle; Position the thread spool on the spool pin, ensuring it unwinds smoothly. Engage the bobbin winder by sliding the lever into position.
Hold the thread tail firmly for the first few rotations to prevent slipping. Once several layers are wound, gently guide the thread to ensure even distribution. Disengage the winder when full and trim the thread. A correctly wound bobbin ensures consistent stitch quality.
Installing the Needle
Installing the needle correctly is vital for your Lil’ Sew & Sew’s operation. Ensure the machine is turned off before proceeding. Loosen the needle clamp screw using a small screwdriver. Insert a new needle with the flat side facing the back of the machine.
Push the needle upwards as far as it will go into the clamp. Tighten the needle clamp screw securely, but avoid over-tightening. A properly installed needle prevents breakage and ensures smooth fabric feeding. Always use the correct needle type for your fabric.
Basic Sewing Operations
The Lil’ Sew & Sew excels at straight stitching, a fundamental technique. Adjusting the stitch length allows for versatility with different fabrics and project requirements.
Straight Stitching
Straight stitching is the foundational technique for operating your Lil’ Sew & Sew. Begin by ensuring the machine is correctly threaded and the fabric is positioned under the presser foot. Gently guide the fabric, maintaining a consistent speed, allowing the machine to create a neat, linear seam.
Avoid pulling or pushing the fabric, as this can lead to uneven stitches. Practice on scrap fabric first to get a feel for the machine’s rhythm. The LSS-505 and LSS-202 models are capable of producing surprisingly consistent straight seams when used with care and attention to detail. Remember to always use a properly installed needle!
Adjusting Stitch Length
Adjusting stitch length on your Lil’ Sew & Sew is a crucial skill for versatile sewing. While these compact machines offer limited adjustments, understanding the process is key. Typically, a small dial or lever controls the stitch length; experiment with different settings on scrap fabric.
Shorter stitch lengths are ideal for delicate fabrics or areas requiring extra strength, while longer stitches are suitable for thicker materials or quicker seams. Be mindful that excessive length can cause puckering. The LSS-505 and LSS-202 models provide basic, yet functional, stitch length control.

Troubleshooting Common Issues
Common problems with the Lil’ Sew & Sew include needle breakage, thread jamming, and motor malfunctions. This section provides solutions for these frequently encountered issues.
Needle Breaking
Frequent needle breakage with your Lil’ Sew & Sew can be frustrating, but often has a simple solution. Ensure you are using the correct needle type and size for your fabric weight; a too-thin needle will easily snap.
Also, verify the needle is correctly inserted into the clamp, and that the clamp screw is securely tightened. Incorrect threading or attempting to sew through excessively thick material can also cause breakage.
Finally, a bent or damaged needle should always be replaced immediately. Remember to always sew at a reasonable speed, as forcing the machine can lead to needle failure.
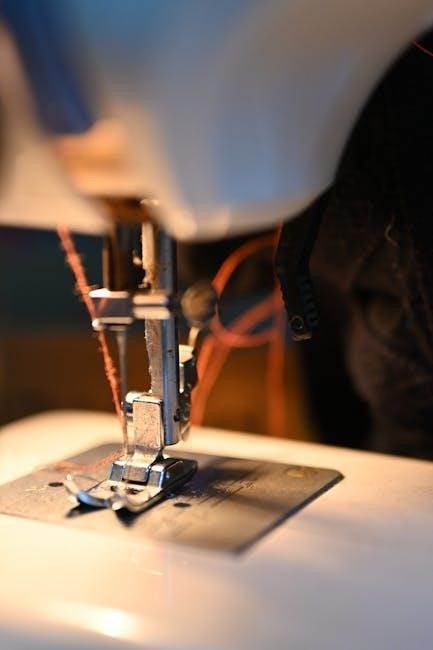
Thread Jamming
Thread jamming is a common issue with the Lil’ Sew & Sew, often stemming from improper threading. Double-check that the thread is correctly guided through all tension discs and the take-up lever. Ensure the bobbin is wound evenly and inserted correctly into its case.
Lint and debris accumulating within the machine can also cause jams; regular cleaning is crucial. Avoid using low-quality thread, as it tends to break and tangle more easily.
Slow down your sewing speed and gently remove any tangled thread, avoiding forceful pulling which can damage internal components.
Motor Problems
Motor issues in the Lil’ Sew & Sew often manifest as sluggish operation or complete failure. These machines utilize a 6-volt motor, susceptible to wear and tear. First, verify the power supply and ensure the foot pedal is firmly connected.
If the motor hums but doesn’t turn the needle, internal components may be jammed with lint or require lubrication. Avoid forcing the mechanism.
Complete motor failure may necessitate professional repair or replacement, considering the machine’s overall value and cost of service.

Finding Replacement Parts
Replacement parts for the LSS-505 and LSS-202 can be sourced online, particularly through eBay and potentially Walmart, though availability varies significantly.
Sourcing Parts for LSS-505
Finding replacement parts for the Michley LSS-505 can prove challenging due to its age and status as a budget-friendly, mini sewing machine. Online marketplaces like eBay frequently list components, both new and used, from various sellers. Reddit discussions suggest seeking advice from the r/sewhelp community regarding potential substitutes if original parts are unavailable.
Careful searching is crucial, utilizing specific keywords like “LSS-505 parts” or “Lil Sew & Sew parts.” Be prepared to potentially purchase individual parts from different sellers to complete a repair. Patience and diligent searching are key to successfully restoring your LSS-505.
Sourcing Parts for LSS-202
Locating replacement parts for the Michley LSS-202 shares similarities with the LSS-505, requiring resourceful searching. Walmart.com previously sold the machine, but parts availability directly through them is unlikely now. Online auction sites, particularly eBay, represent the most viable option for finding both new and used components.
Utilize precise search terms like “LSS-202 parts” or “Lil Sew & Sew LSS-202” to refine results. Consider joining sewing-focused online forums, such as Reddit’s r/sewing, to inquire about potential sources or compatible substitute parts from fellow enthusiasts.
Maintenance and Care
Regular cleaning and occasional lubrication are vital for maintaining your Lil’ Sew & Sew. This ensures smooth operation and extends the machine’s lifespan considerably.
Cleaning Your Lil’ Sew & Sew
Consistent cleaning prevents lint and debris buildup, which can cause malfunctions. Always unplug the machine before cleaning! Use a small brush, like a paintbrush, to gently remove lint from the bobbin area, feed dogs, and around the needle clamp. A cotton swab dipped in rubbing alcohol can clean hard-to-reach spots.
Avoid using compressed air, as it can push debris further inside. Wipe the exterior with a slightly damp cloth. Never use water directly on the machine. Pay attention to the motor area, ensuring it remains dust-free. Regular cleaning contributes significantly to the longevity and performance of your Lil’ Sew & Sew.
Lubrication
Proper lubrication is crucial for smooth operation, but over-lubrication can attract dust. Apply a small drop of sewing machine oil to the motor shaft and any visible moving parts, like the bobbin winder. Avoid oiling the feed dogs or tension discs, as this can affect stitch quality.
Use only sewing machine oil; other lubricants can damage the machine. After oiling, run the machine briefly to distribute the oil evenly. Do not lubricate the machine excessively – a little goes a long way. Regular, minimal lubrication extends the life of your Lil’ Sew & Sew.
Advanced Techniques (Limited by Machine Capabilities)
The Lil’ Sew & Sew excels at basic tasks. While limited, users can attempt simple hemming and sewing lightweight fabrics with careful technique and patience.
Sewing Different Fabric Types
The Lil’ Sew & Sew, with its 6-volt motor, is best suited for lightweight fabrics. Attempting heavier materials can strain the motor and potentially cause damage. Successful sewing depends on fabric choice; cotton and thin blends work best.
Avoid denim, canvas, or multiple layers, as these can overwhelm the machine. When working with slightly thicker fabrics, reduce sewing speed and use a new, sharp needle. Experiment with scrap fabric first to test stitch quality and prevent issues. Remember, this machine has limitations, and delicate handling is crucial for optimal results.
Basic Hemming
The Lil’ Sew & Sew can perform basic hems on lightweight garments, but precision is key. Fold the fabric edge to the desired hem width and iron to create a crisp crease. Pin the hem in place, ensuring even distribution.
Use a straight stitch with a shorter stitch length for a neater finish. Guide the fabric slowly and steadily, avoiding pulling or pushing. Due to the machine’s limited power, thicker hems or multiple layers may prove difficult; Practice on scraps first to achieve consistent, professional-looking results.